Actions
Topics
Navigation Bar
The fastest way to switch between work areas and access standard actions is via the Navigation Bar. This bar is displayed in the upper area of the browser window - depending on the configuration.

The display of the navigation icons depends on the currently opened Work Area. The current work area is highlighted in color.
To switch to a different work area or start another action, such as uploading documents or performing a search, press the corresponding icon. If the project overview is open, first select a project in the tree and then choose the desired work area.
The download icon is only offered if documents are in the download order, or if the properties page of a document/CAD document is open.
To improve clarity, the navigation bar can be minimized via the action
 /
/ minimize

or expand.

Main Action Bar
Special actions that cannot be assigned to an object are called up via the Main Action Bar. This bar is displayed above the tree shown on the left side.

The offered actions depend on the currently displayed view and your own rights. The following actions are possible:
| To Home Page go. | |
| Opens the Clipboard. | |
| Opens the Calendar. | |
| Switches to the Organization Tree. This action is only available in the Project Overview and only for members with the Role Administrator or Project Manager. | |
| Opens the Quick Start Guide in a separate browser window. | |
| Log Out from PlanTeam-SPACE after finishing your work. |
Personal Actions
The personal actions are available to you at any time in all views of PlanTeam-SPACE. With one click on the icon next to the logo in the top right, you can see the available actions.
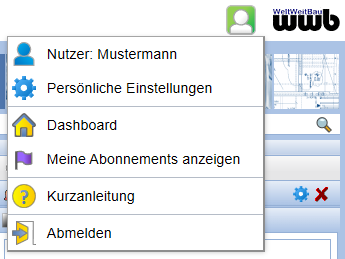
 User User |
Opens the page for an overview of the personal properties. |
 Personal Settings Personal Settings |
Opens the dialog for adjusting the personal settings. |
 Dashboard Dashboard |
Opens the News Dashboard. |
 View My Subscriptions View My Subscriptions |
Opens a tabular representation of personal subscriptions. |
 Quick Start Guide Quick Start Guide |
Opens the Quick Start Guide in a new browser window. |
 Log off Log off |
You will be securely logged off from PlanTeam-SPACE with this action. |
Context Menu
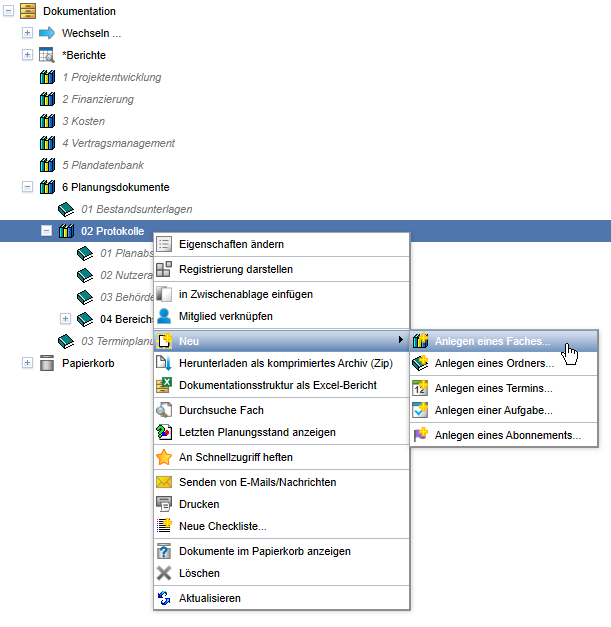
Most actions for an object can be invoked directly via
its context menu. The context menu can be opened by clicking with the right
mouse button on the object in the tree on the left side of the window
or in tables on the right side of the window. To keep the context menu
clear, a second level is offered for some actions.
The action paste to clipboard is also offered here,
even if the object is already contained in there.
Via the context menu at other locations in the PlanTeam-SPACE interface, general actions can be invoked. For this, click the right mouse button while the mouse pointer is not on an object of the project platform.
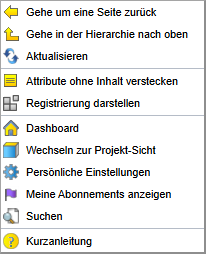
Depending on the open view, the following actions are available among others:
| Opens the last selected page. | |
| The properties page of the parent object in the tree structure is opened. | |
| The current page is reloaded. | |
| Attributes without a set value are hidden on the properties page. | |
| Opens the registration of the current object. Here, administrative metadata, such as the last change date, are displayed. | |
| Return to the home page. | |
| Update Web Settings |
Opens the dialog to adjust personal settings. |
| Opens the search mask. | |
 Quick Start Guide Quick Start Guide |
Opens the Quick Start Guide. |
Toolbar
The available actions that can be applied to an object are accessible via icons on the Action Bar accessible. When you move the mouse pointer over an icon, a hint about the action to be performed is displayed in a tooltip. If an action is not available, the icon is displayed in gray and cannot be selected.
Example:

The most common actions are described below:
| Opens a form for changing the properties of the object. | |
| Using this button, you can view the registration data of the object. When and by whom was the object registered? When and by whom were the entries last modified? | |
| Opens a dialog for inserting objects from the Clipboard. These will then (if possible) be linked with the current object. | |
| Copies the object to the Clipboard. | |
 |
Creates a new appointment. |
 |
Creates a new task. |
| Switches to thumbnail view. | |
| Switches to table view. | |
| Sends an E-mail or message related to the current object to selected recipients. | |
| Deletes the object. | |
| Creates a PDF document with the properties of the object. This can subsequently be printed. | |
| Notes compose and edit for the object. | |
| Hide unpopulated attributes in Properties. For displaying the attributes, use the action |
Adapting the action bar
Customize the action bar to suit your own needs by selecting the action  on the right side of the Actions bar click and then select Adapt.
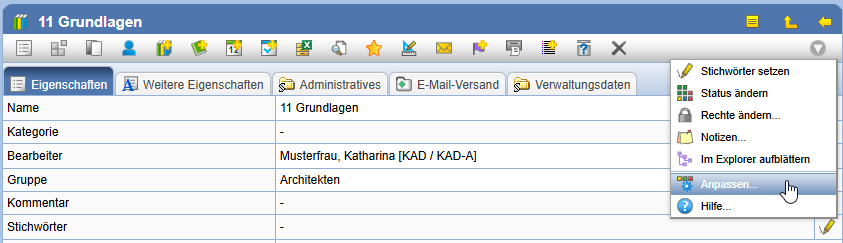
Via Drag & Drop you can adjust the position of actions and remove actions that you do not need.
Actions that you use more frequently can be moved from the bottom bar to the top bar.

To restore the default setting, select the action  on the bottom bar.
Actions in Property Pages
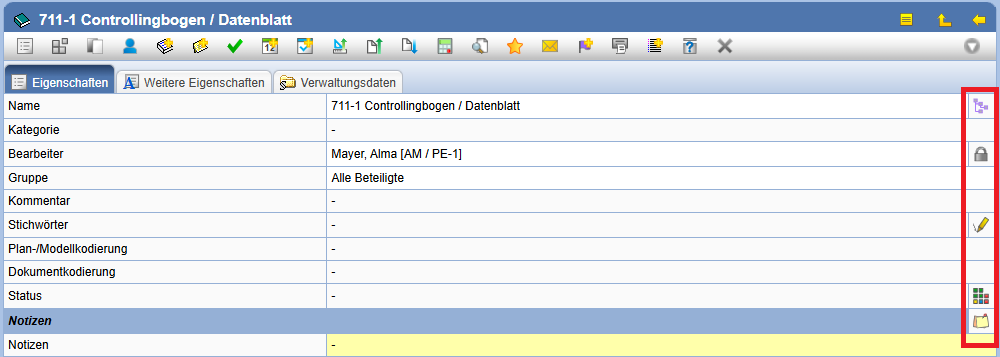
In some datasheets, additional available actions are located on the right-hand side of the respective field.
Actions in Lists
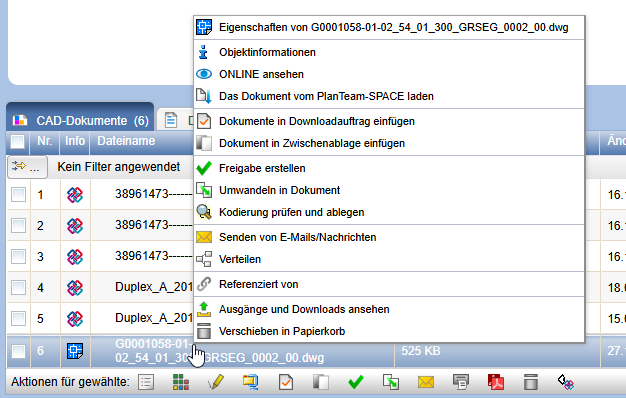
In certain lists, actions may be available for the displayed objects. These can either be performed directly in right column to be performed, over the Context menu (right-click) on the corresponding row or for multiple objects simultaneously by setting the checkmark in the corresponding rows and pressing Action icons in the footer of the list.
Actions in the miniature view
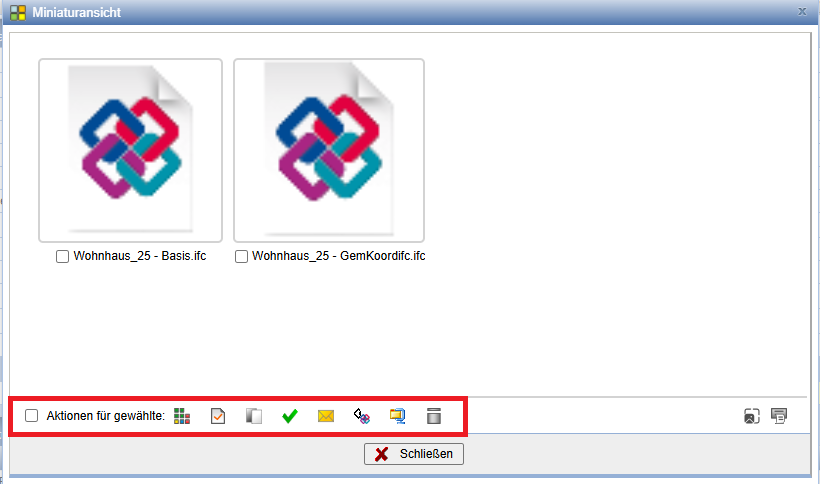
With the action in the Actions toolbar
on the Properties page, the documents contained in the folder are displayed in the thumbnail view.
Mark the desired objects, and perform the desired action in the bar below the gallery.
The following actions are available to you:
| Changes the additional attributes of the object. | |
| Download compressed documents as a Zip archive | |
| This action adds documents to the download order list. That is, you can collect multiple documents in the download order and then download them simultaneously as a Zip file. When called from the table footer, this action is executed for all marked files. | |
| Copies the objects to the clipboard. | |
 |
Creates a share for the objects. |
| Moves the objects to the trash. |
Tooltips
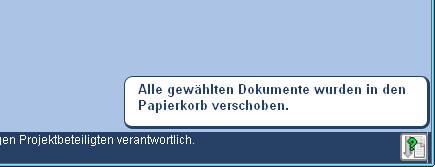
Many actions are confirmed by tooltips. These tooltips serve as information and appear for a short time at the bottom right edge of your browser window. They disappear automatically; confirmation via mouse click is not necessary.
Edit master data
Via the symbol  you
can change, delete, and add new master data.
The right to edit master data depends on the configuration.
you
can change, delete, and add new master data.
The right to edit master data depends on the configuration.

Click the icon to open the master data editor.
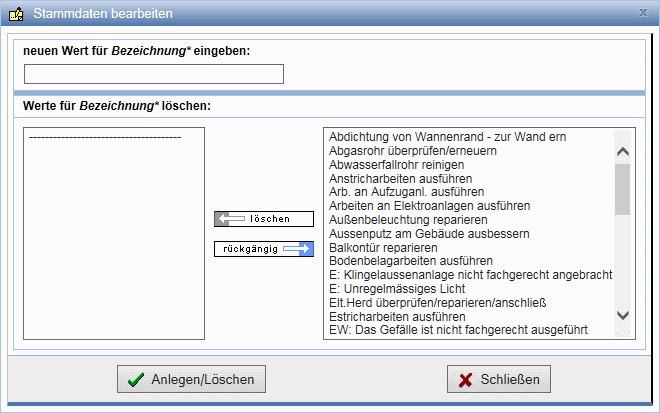
On the right side, all master data created for the object are listed.
To enter a value, type it into the field new value and confirm with Create/Delete.
If you want to delete one or more values, mark them and press delete between the two lists. The values will now be moved to the left side. If you do not want to delete a value after all, mark it on the left side and press undo. By pressing Create/Delete the values on the left side are permanently deleted from the master data.
To close the master data editor, press Close.
| Note: | Deleting master data only affects the selection of values. Values used in objects are not deleted. |