Upload Documents
Topics
- General
- Upload via Navigation Buttons
- Upload to a Folder
- Upload CAD Documents
- Upload Documents
- Upload via Drag & Drop
- Upload Documents via Quick Upload
- Upload Email Files
- Actions After Upload
- Upload New Version
- Upload Attachments
- Create Paper Document
- Distribution Notes
- Planning and Document Coding
- Coding Assistance
- Automatic Import
- View Entries in the Inbound Journal
General
When uploading files, there is a distinction between CAD Documents (Plans) and Documents (correspondence, images, minutes, calculations, etc.). The term CAD Document covers files that substantively represent a plan. In addition to AutoCAD files (dwg) and plot files (plt), pdf files can also represent a plan and are then considered CAD Documents.
Documents are stored in document folders. Plans are stored in the indexes of plan folders. If documents are relevant for a plan, they can also be stored in the index of a plan folder. However, it is not possible to include CAD Documents in document folders.
Files can be uploaded at a central location (Automatic Import), into a Folder or directly into a Document folder, or into a plan map index uploaded.
Upload via Navigation Buttons
The easiest way to upload documents is via the Upload button in the navigation bar.

First, select the desired storage location in the documentation structure and then press the Action button. Based on the selected storage location, the corresponding form for importing documents or CAD documents will be opened.
| Note: | If coding exists, the form for the Automatic Import will be opened. |
Upload to a Folder
Files can be loaded directly into a folder. If a plan or document coding is specified in the
folder, complete the coding after selecting the file via the Coding Assistant
. The
coding is evaluated during upload and the file is stored at the
corresponding location. If no existing storage location can be found, the missing plan map and the
index or the document folder are automatically created.
You can select individual or multiple files either using the action Select Files or directly via Drag & Drop into the list of files to be uploaded.
If no coding is specified in the folder, you must specify a plan map and an
index via the button for CAD documents, or via the
button
for an existing document folder. Alternatively, you can enter a custom name for the folder.
Non-existent folders are newly created.
Via the icon  when
uploading documents or
when
uploading documents or  when
uploading CAD documents, the folder used last time for uploading in the folder is set as the default storage location.
when
uploading CAD documents, the folder used last time for uploading in the folder is set as the default storage location.
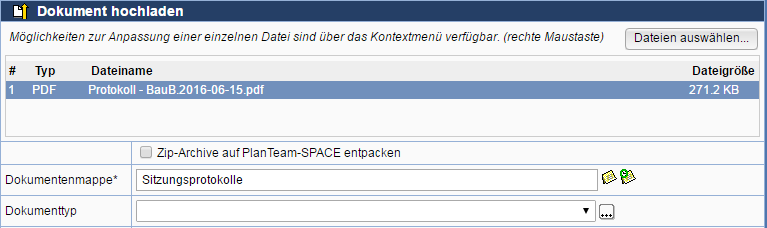
Upload CAD documents
To upload CAD documents (plans), press the action in the Actions bar of the target folder, target plan folder, or target index .
Now select the files to upload by pressing Select files or add these above Drag & Drop directly into the
list of files to be uploaded.
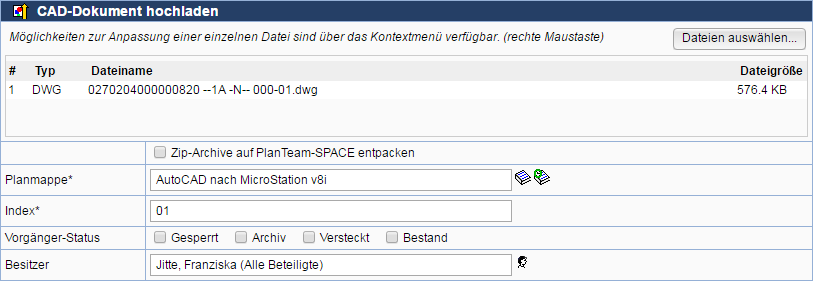
The uploaded CAD document must be saved in an index to a plan folder. To do this, you first specify the target folder with the action or
(for the last selected folder). If these actions are not available, no folders have been created yet. Then select an existing or previously used index.
If you want to save the CAD document in a new index, enter next to Index enter the title of the new index.
If a zip file is selected, it can optionally be extracted on the server. The contained files are then stored individually.
If desired, change the name of the document in the "Import as" field via the action Change Properties from the context menu of a single file.
If necessary, adjust the registered owner in the Owner field.
You can set the status of the predecessor by uploading. Thus, when a new index is generated for CAD documents, the last existing index receives the selected status.
The Plantyp of a CAD document is taken from the encoding
If you upload a CAD document to an unencoded plan folder, the Plantyp taken from the properties of the index.
| Note: | All letters contained in the filename that do not match the content of the ISO 8859-1 correspond, are replaced by the character "_". |
Upload documents
To upload documents (correspondence, images, etc.), press
the action in the Actions bar of the target folder or the desired
document library . Now select the files to be uploaded by pressing
Select Files or add them via Drag & Drop directly into the
list of files to be uploaded.
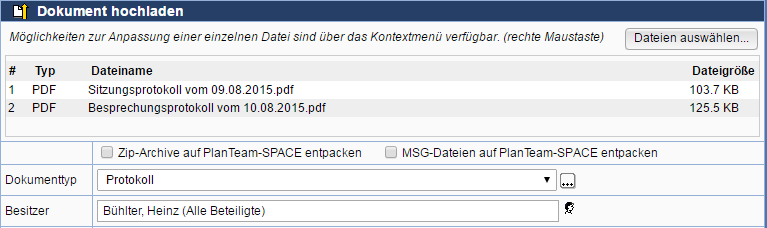
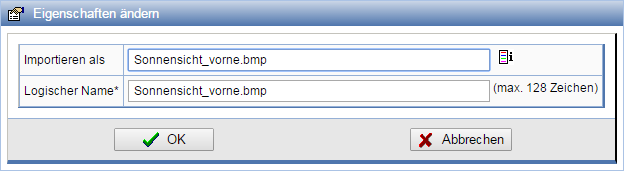
If desired, change the name of the document in the "Import as" field using the action Change Properties from the context menu of the corresponding file. The logical name corresponds to the internally used filename and is supplemented with a number if a file with the same name already exists.
Adjust the registered owner in the Owner field if necessary.
If a Zip file is selected, it can optionally be unpacked on the server. The contained files will then be stored individually under their names.
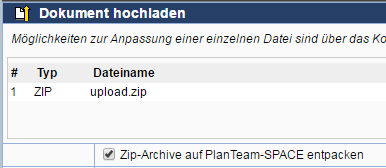
If a document is uploaded to a folder that does not contain a document library, this is created automatically. The library type is then taken over from the document type. If a document is uploaded directly into a document library, the document type is taken over from the document library or an attempt is made to determine it based on the encoding.
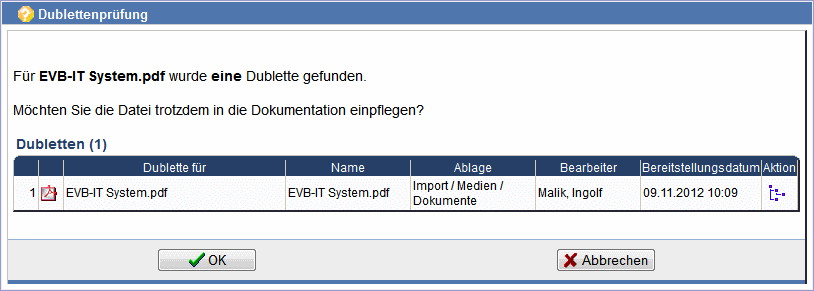
To avoid duplicates, a duplicate check can be performed when uploading files, depending on the configuration. In this case, the entire documentation is examined for identical files and these are subsequently listed. If the documents should not be imported into the documentation, the process can be aborted at this point.
Additionally, it is possible to create references via the action References to Paper Documents and
via the action
Links to Web pages.
To ensure uniqueness and thus also better overview within the documentation, a uniqueness check is carried out when uploading documents. If the filename is already present in the document library, the import process is aborted at this point.
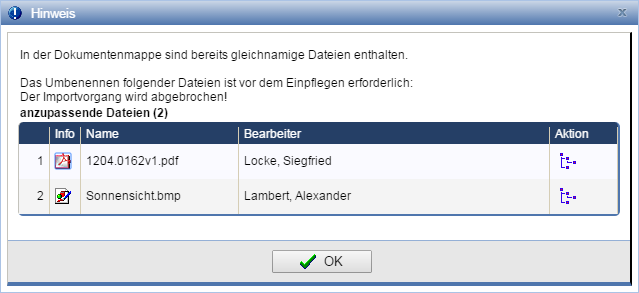
In this case, adjust the name in the field Import as using the action Change Properties from the context menu of the corresponding file.
Upload via Drag & Drop
Files can be added via Drag & Drop of the selection. To do this, select one or more files from your file system and drag them with the left mouse button pressed over the area of the file list. Release the mouse button. The files should now be listed as entries.

| Note: | All letters contained in the filename that do not correspond to the content of the ISO 8859-1correspond, are replaced by the character "_". |
Upload documents for quick upload
A particularly convenient way to upload (CAD) documents is via the Quick Upload using drag and drop. The Quick Upload is only available for document folders and indices of unencoded plan maps and is located on the right in the toolbar on the corresponding properties page. To upload a document, drag the file into the marked area.
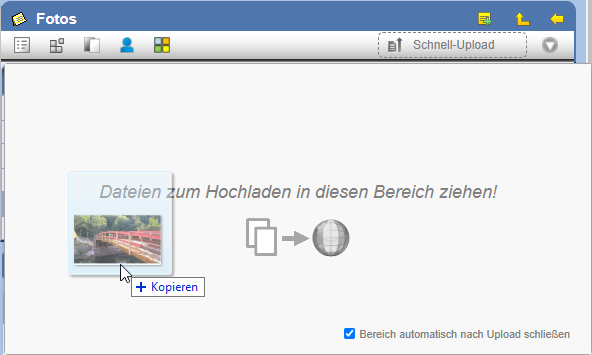
By clicking, you can enlarge the area and track the upload status. In this way, you can also upload multiple files simultaneously.
Upload email files
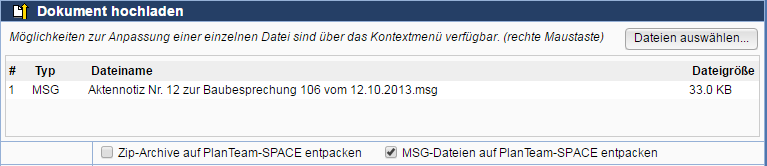
To include emails from external programs, such as Microsoft Outlook or Mozilla Thunderbird, in the documentation, select MSG-format files from your file system during upload.
The format is recognized directly, and it is offered to unpack the MSG file on PlanTeam SPACE if you upload it as a document. If the associated email has already been imported or is already included in PTS, the import process will be aborted.
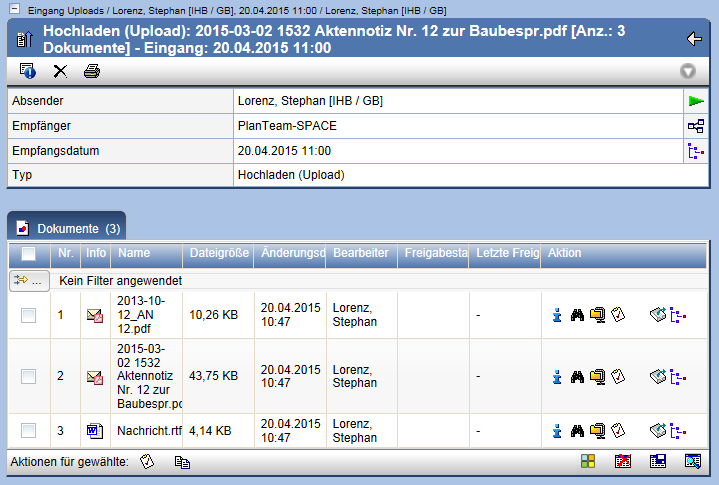
The MSG file is stored in PDF format on the PlanTeam SPACE. The attachments are in the tab Plants displayed. Furthermore, these are as subordinate structure listed under the PDF file of the email in the table.
In addition, the message will also appear in the Message Center's incoming journal under Input Uploads entered.
You can unpack MSG files using the action  in the document's Actions bar.
Decide here first whether the MSG file should be deleted afterwards.
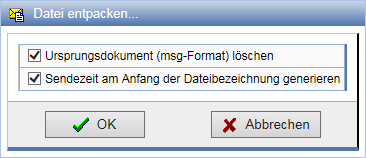
Subsequently, the MSG file is unpacked and provided in PDF format.
Multiple MSG files can also be either in a ZIP file uploaded or directly via Drag & Drop be transferred to the PlanTeam SPACE.
Actions after Upload
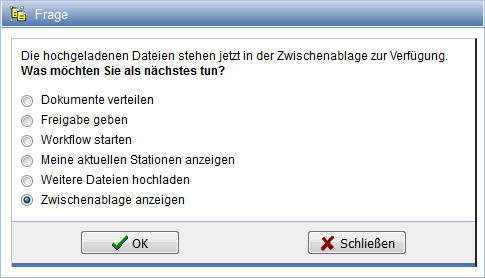
Whenever uploading documents, CAD documents, and uploading multiple files the option Import uploaded file(s) into the clipboard is selected, a dialog opens subsequently in which several options for further processing are available to you.
Upload new version
To provide a new version of an uploaded document,
press in the action bar
of the document or
in the action column of the document table of the parent folder.
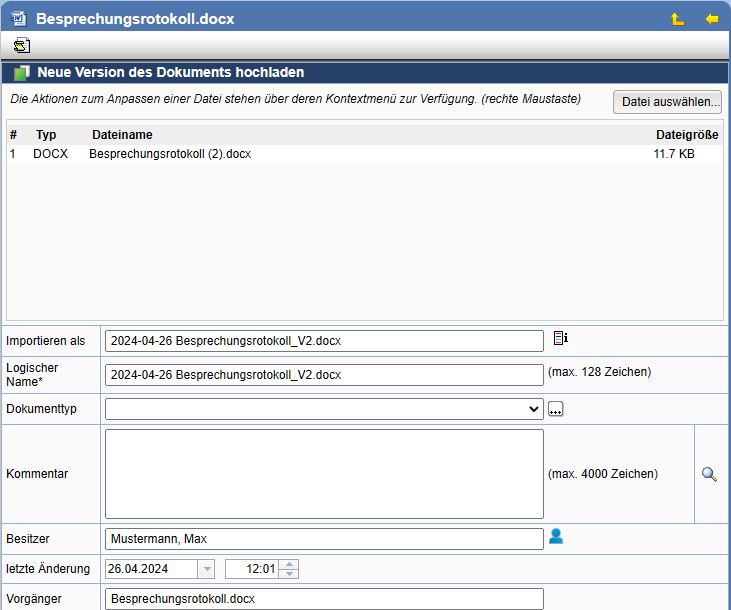
Now select via the buttonSelect fileor drag and drop the new file out.
By default, the new file name is extended with *_V1 (the number always corresponds to the respective version). The standard extension can also be individually configured externally.
If you do not wish to do so, select a different file name and adjust the logical name and status of the predecessor if necessary.
Is this a new version of a BCF file (e.g., bcfzip), the options are Merge versions and Original also behalten available at the end of the page.
The former combines the predecessor and the new version, so that all changes are contained in a single file during parallel processing.
The latter ensures that the original is additionally preserved.
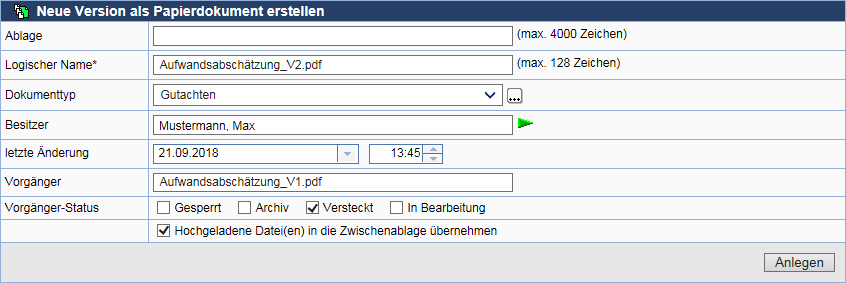
With the actiontop left you can anew version
create as paper document.
For this, a new dialog opens with similar attributes as when uploading a new version. More information about the paper document is available here.
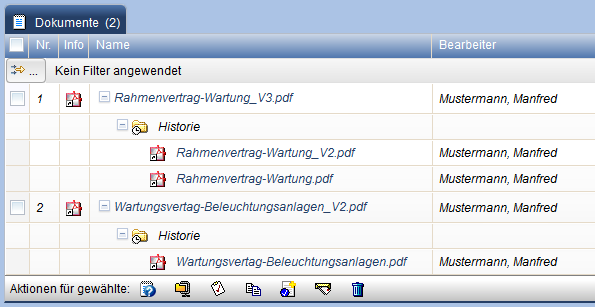
In tables, the new version displays the history (previous versions).
This allows you to quickly get an overview of the older versions of the document.
Post-hoc versioning
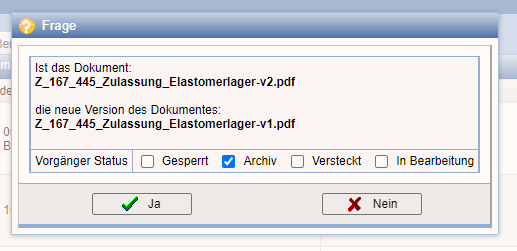
New versions can also be assigned after upload. For this purpose, the new version of a document is dragged and dropped onto the old version in a table. The old document is thendirectPredecessor of the pulled document, whereby an existing predecessor can be replaced. When versioning retroactively, the status of the predecessor document can optionally be adjusted.
Remove from History
The counterpart to post-hoc versioning is removal from the history. A document that is part of a document history as at least one predecessor and/or successor of another document can, on its properties page, be removed via an action in the line Predecessor from the history. In this case, the document is not deleted, but remains as a separate detached document in its folder. If it had both a predecessor and a successor, a direct predecessor-successor relationship is established between these, so the remaining history stays continuously linked.

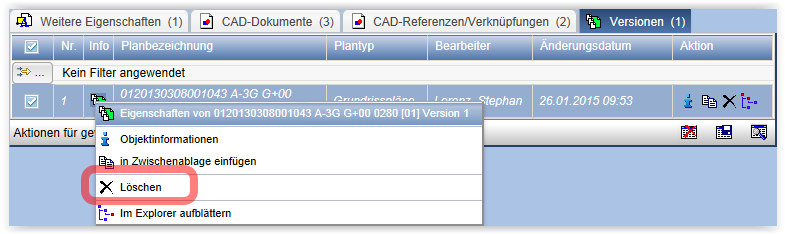
Delete Version
Versions can be directly deleted in the table in the following ways:
in Indexes:
1. Delete a single version via the column Action.
2. Delete multiple versions via the row Actions
for selected.

3. Delete a single version via the context menu.
Upload Attachments
If you want to upload attachments to a document,
press in the action bar  or
select this action via the context menu of the
corresponding document.
or
select this action via the context menu of the
corresponding document.
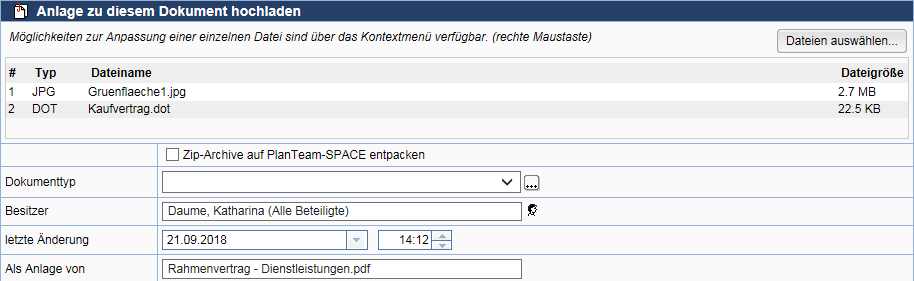
If the new attachment is to be a paper document, click the action Create Paper Document at the top left.
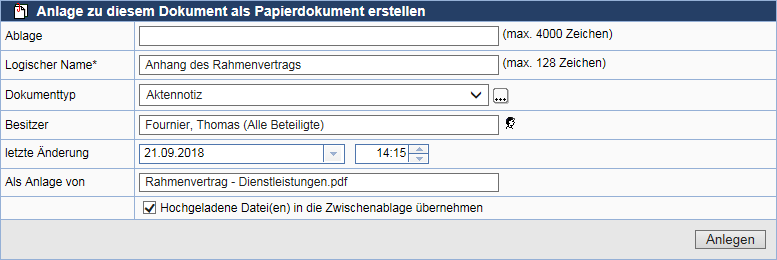
Attachments are listed in tables as a subordinate structure under the associated document.
Create Paper Document
A paper document is a document without a file. With paper documents, documents that already exist but still need to be digitized or created can be recorded.
To create a paper document, press in the desired
document folder on and then on the
action
Create Paper Document
.
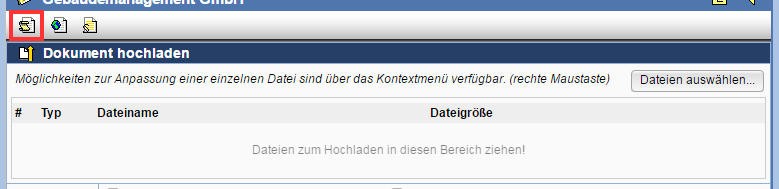
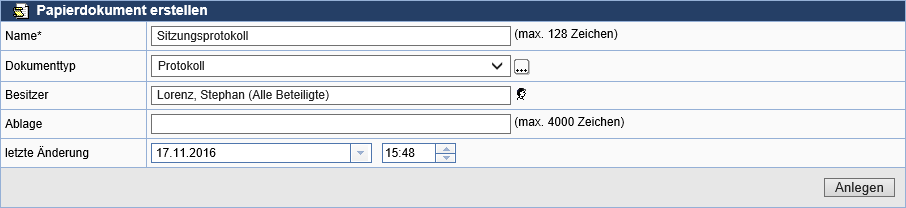
Give the document a name and enter the storage location if there is a physical location for an existing paper document.
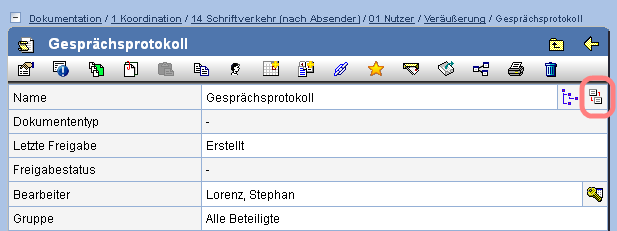
To attach an electronic document (.doc, .pdf, etc.) to a paper document, select the action Attach electronic document on the properties page of the paper document.
Distribution Notes
If you want to inform specific persons simultaneously about the upload of documents, select one of the available distribution lists.
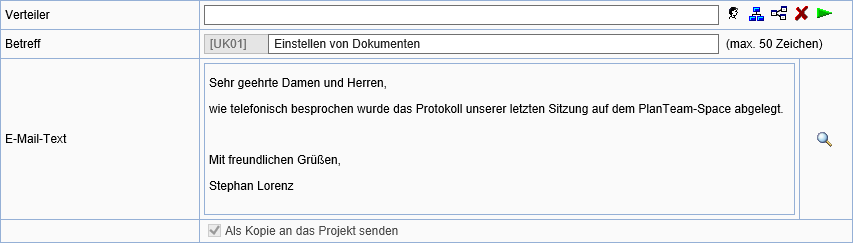
Select via the action a group distribution list or
via the action
an e-mail distribution list
out. When choosing a group distribution list, only distribution lists
for groups containing at least one member are available for selection.
With
remove the selected distribution list. The selected
setting is saved permanently and is pre-set upon the next
call of the form.
If you want to inform a selected group of persons only once,
for which no distribution list exists or should be created,
select the action . Subsequently, a dialog for selecting persons will open.
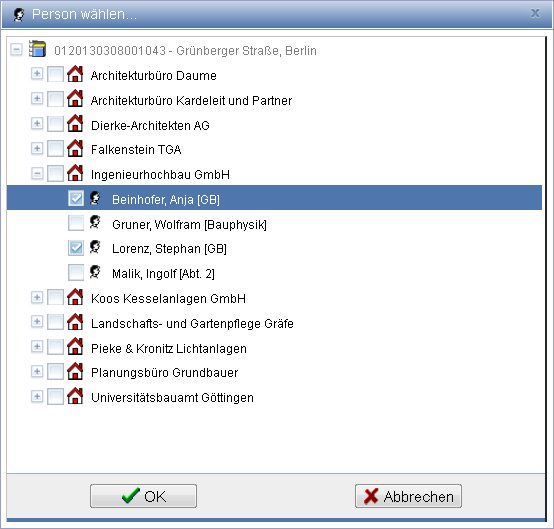
After selecting your persons, in the line Distribution List now appears Multiple Recipients. This temporary distribution list is not saved permanently.

Via the action
details about the distribution list are displayed. Here you can also
modify this in advance here.
If you have selected a distribution list, enter a subject and a message text.
If possible, the recipients of the distribution list receive an e-mail. Additionally, an internal message can be sent to the recipients via the message center of PlanTeam-SPACE.
Plan and Document Coding
To utilize the advantages of the automatic import as well as a uniform and unique identification of plans and documents, coding is used in the documentation. Plans and documents each use their own coding.
A distinction is made between a general coding rule (i.e., how
plans and documents are to be coded and which values
are available for the coding), defined specifications in folders
and maps based on the coding rule, and concrete codings for
plans and documents. With the help of the action
in the top node of the documentation, you can display the
coding options clearly in HTML, PDF, or Excel format.
If a coding has been stored in the documentation, the coding is offered during the import of plans and documents. To avoid errors when creating valid codings, please use the Coding Assistant.
| Note: | Please note that the coding in the documentation must be unique, and therefore there cannot be two files with the same coding in the entire repository. If necessary, you will be prompted to adjust the coding. |
Coding Guide
To avoid errors when creating valid plan and document codings, you should use the Coding Guide as much as possible .
To do this, open the context menu of a single file and select the action Change Properties.

Now open the Coding Guide
.
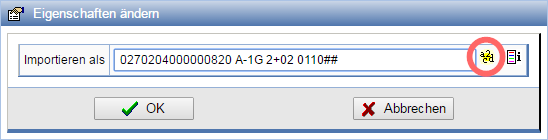
In the Coding Guide, conveniently select the valid values for the individual positions of the coding.
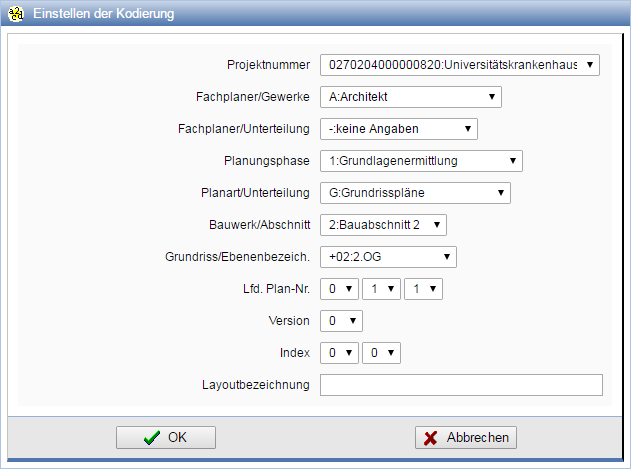
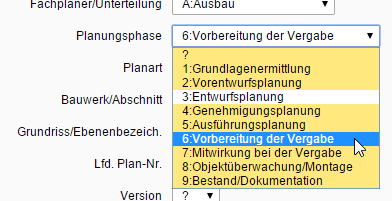
Values within the coding can have dependencies on other values or on coding rules in folders. Invalid values are highlighted in color.
By pressing OK, the settings are transferred to the field for Document/Plan designation. Values not assigned in the Coding Guide (marked by a question mark '?') are now represented by diamonds ('#'). When taking over the coding as a filename, these positions are filled with hyphens ('-').
Change date from coding
When uploading documents, it is possible to set the change date via the coding. To do this, select a desired date in the Coding Guide for document codings from the field Date.
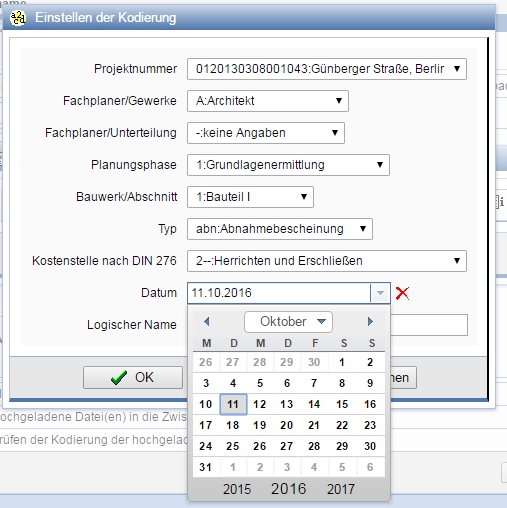
After confirming the Coding Guide, the set date appears as the change date of the document.

Automatic Import
If a coding has been defined for the documentation, documents and CAD documents can be uploaded at a central location and stored by the system at the designated locations. In order for files to be sorted automatically, they must be coded. This means that the names of the files must correspond to the coding specification and an appropriate repository must already have been defined.
Press the action
Automatic Import according to configuration.
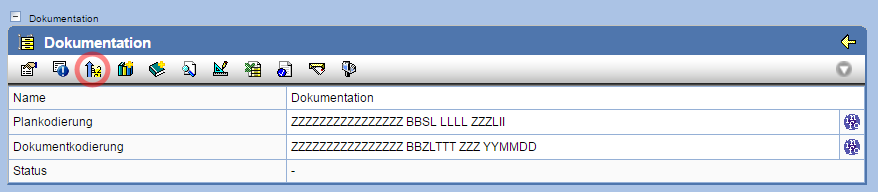
The form for uploading documents via Automatic Import is opened.
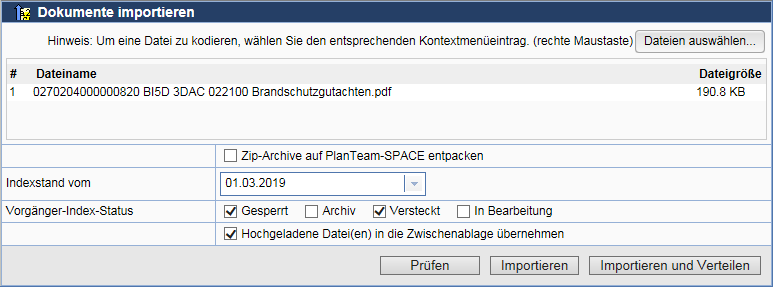
Next, select the files to be uploaded. For this, you can use the action Select Files or the corresponding files via Drag & Drop directly into the list of files to upload.
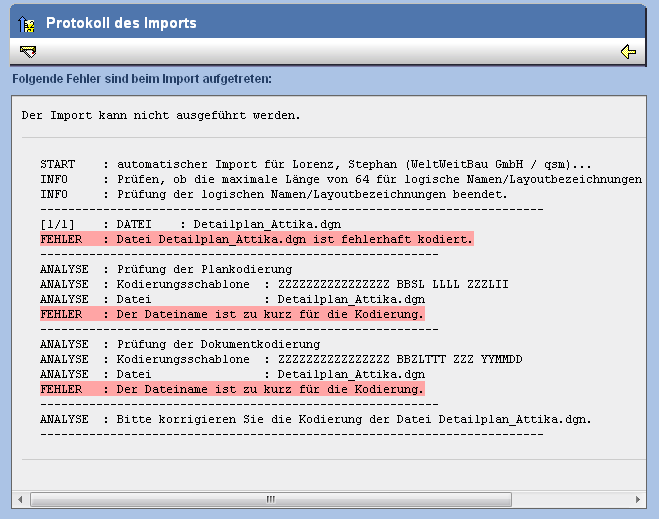
By clicking on Check is checked whether the encoding of the document to be imported matches that of the project. The result is displayed as a log. With Import documents will be imported, provided the encoding is correct. Select Import and Distribute, the E-mail form for distribution opens after the import.
When uploadinga single fileis attempted to evaluate the filename regarding the encoding used. Shouldunzipped, an unencoded file is uploaded, the encoding last selected in the current session will be suggested automatically. The file would then be stored at the same location in the documentation as the last document. However, you can change the encoding at this point if necessary.
Use the following Encoding Help for plank encodings  or for document codings
  .
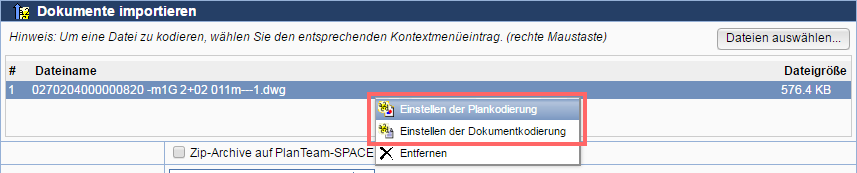
By assigning the file to a plan or document code, it is automatically imported as a CAD document or accordingly as a document. To do this, open the corresponding entry in the context menu of the respective file.
.
By assigning the file to a plan or document code, it is automatically imported as a CAD document or accordingly as a document. To do this, open the corresponding entry in the context menu of the respective file.
If a document encoding with a date field is configured and this field is populated in the encoding of the document to be uploaded, the date from the encoding will be used as the file's modification date.
If an error occurs during a check or import, it will be highlighted in red in the log.
Should you have a Zip file having been selected, it is assumed that this already contains coded files. Accordingly, the actions for coding a file are not offered here. The zip file is automatically unpacked during import and attempts to sort all contained files according to their encoding.
To correctly encode multiple files, the use of the tool PlanZip recommended, which you can obtain from the company WeltWeitBau. With PlanZip, files are conveniently encoded in advance on the local system and consolidated into a single Zip file. The upload can then be limited to a single file. However, please note that with appropriate configuration, PlanZip is also available via an applet integrated into the PlanTeam SPACE.
| Note: | For use of the encoding tool PlanZip (you need the configuration file for encoding, not the applet) and may need to download it. |
Please download the configuration file for encoding via the action in the Actions bar
of the automatic import form. Please note that each project uses its own
configuration file and must be downloaded separately.
To pre-populate values for additionally defined attributes in PlanZip,
please download the attribute file via the action the
attribute file.
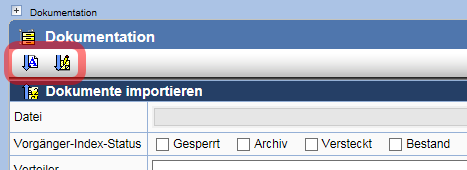
Check files and import
Before importing documents, check whether the files correspond to the specified encoding on one hand and can also be sorted into the documentation (i.e., folders with the corresponding encoding exist). Press Check.
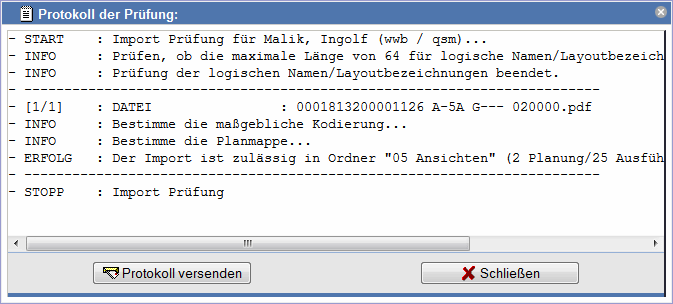
The inspection report is displayed in a separate dialog and can be sent to your assigned e-mail address by pressing Send Report to your assigned e-mail address. This action is particularly useful when the check is not successful, as it facilitates easier evaluation of the reasons leading to the failure.
To upload the files now, press Import. The files will now automatically be sorted into the documentation according to their encoding. Documents that were not successfully sorted will be listed in the following import report. For later evaluation, you can have the report sent to you via e-mail.
Automatic import of an email attachment
Automatic import can also be used for email attachments. Further details can be found in the corresponding section of the Message Center, Automatic import of an email attachment.
| Note: | Please note that uploading files may take some time depending on the file size and network connection. You can continue working while uploading; however, no further actions can be started. |
View entries in the input journal
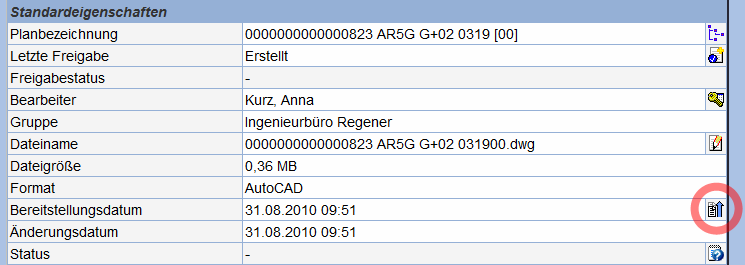
Via the symbol the upload history
for a specific document can be retrieved. You will receive the entry from the
input journal that exists for this document.