Managing persons
Topics
| Note: | In order to use these features, you must be logged in as administrator or project manager, depending on the configuration! |
Creating a person
Navigate to the organization structure by clicking on in the menu bar, unless you are already there. In
the tree view, select the organization or department for which you want to create a person.
All information about the selected organization/department is displayed in the work area.

Persons can be created by clicking on one of three buttons in the action bar:
| Create a person through manual entry of values. | |
| Create a person by using an electronic business card. | |
| Create an N.N. person. Later on, you can convert this person to a regular person. |
Click on in the action bar
and enter all relevant personal data in the displayed form.

Click on Create to create the person.
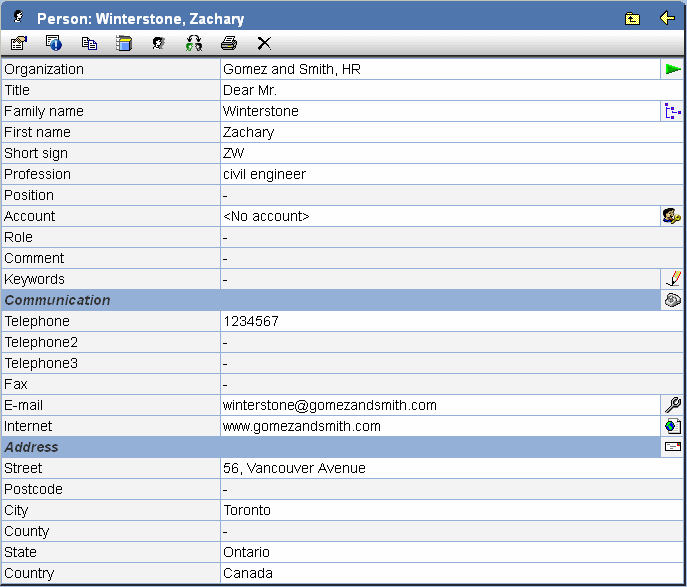
Creating a person from a business card
If you have a person's electronic business card, you can upload it and do not need to enter the data manually.
Click on in the action
bar and press the button Browse... to browse for the electronic business card in the file
system.
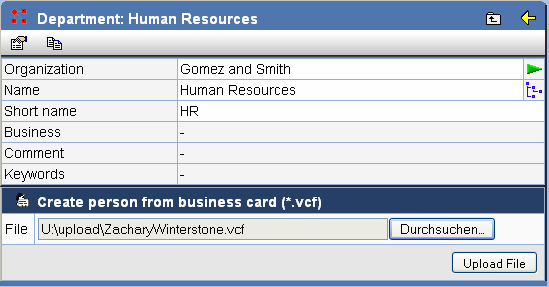
Click Upload file to copy the data.
Creating an N.N. person
On the properties page of the department or organization in which you want to create a new N.N.
person, click in the action bar.
The N.N. person receives the name and contact details of the organization or department in which it was created.
Later on, you can convert the N.N. person to a regular person.
Changing the properties of a person
By marking a person in the organization tree or in the result list of a search, the properties page of a person opens up.
The following actions are possible:
| Change the master data of the person. | |
| Display the registry data of the person. When and by whom was the person registered? When and by whom were the entries last changed? | |
| Set the person to "former". | |
| Shows the membership to projects, i.e. in which projects the person is a member. | |
| Copy the person to the clipboard to insert this person e.g. in another organization, department or group. It is also possible to copy several persons at once to the clipboard from the result list of a search. | |
| Delete this person. | |
| Creates a document with the properties of the object. This can then be printed. | |
| Go to the properties page of the parent organization. | |
| Navigate to the selected person in the organization structure. | |
| Assign an account to the person. | |
| Set keywords. By clicking on this icon you obtain a text box where you can set keywords. These keywords can be used as search criteria in a search for the person. | |
| Change the communication data of the person. | |
| Change the address of the person. In order to apply the address change of a person quickly, it is possible to inherit the address of organizations and departments to the person. To this end, "inherit address" must be chosen in the form. |
Changing the contact data of a person
If you wish to change the contact data of a person, click on at the end of the line "communication". You can
change the neccessary information in the displayed form.
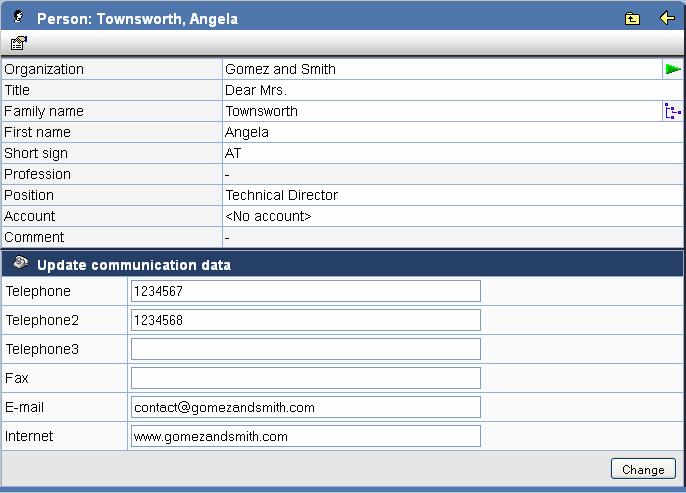
Click on Change to apply the changes.
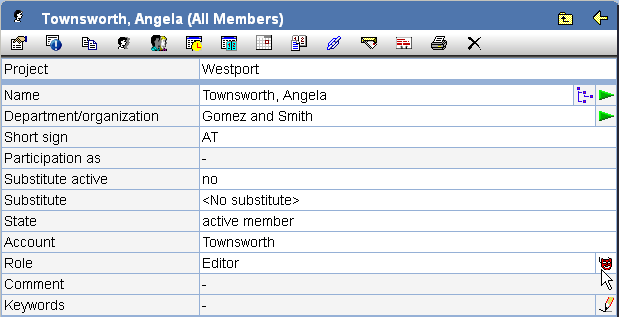
Setting roles for persons
Members hold certain roles in projects. These roles are coupled to defined rights. By default, members obtain the role editor and are allowed for example to upload and download documents from the PlanTeam-SPACE. See managing roles for more information about roles.
On the properties pages of persons, the roles of a person can be preset for when they become members in a project. Roles can only be set by the administrator and the project manager and has to be configured for the PlanTeam-SPACE.
In order to set the roles for a person, open their properties page and choose next to the field roles.
A dialog pops up where the roles for the member can be selected. Select all desired roles. You
can obtain more information about a certain role by clicking on in the corresponding row.
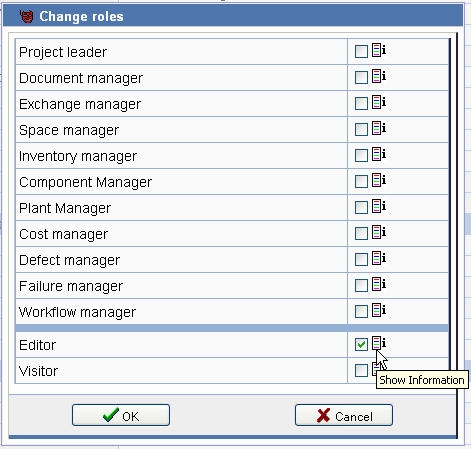
Confirm by clicking on OK. The next time the person is added as a member to a project, these roles are assigned to the member. The roles of already existing memberships are not modified.
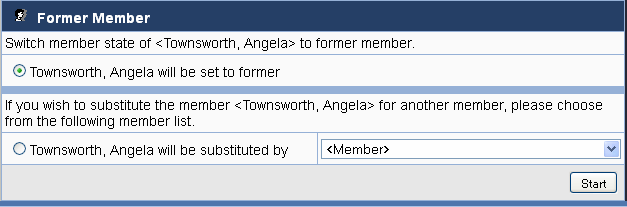
Setting a person to former
In order to set a person to the status "former", click in the action bar. There are several options for
dealing with linked memberships and the with the account:
To re-activate a person, again click the icon in the action bar. An existing account is also
automatically activated. Memberships with the status "former" will not be activated automatically
and must be activated manually, if
desired.
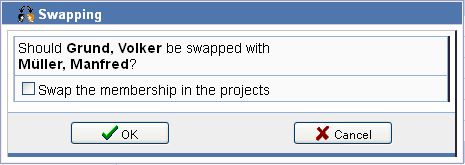
Swapping persons
Persons without accounts can be swapped. For the affected persons, their membership in organizations is swapped as well.
In order to swap two persons, select the first person in the person tree and click in the action bar. The person is
marked for the swap after confirming a query.
Now mark the second person in the person tree and click in the action bar. After confirmation of the
query, the persons are swapped. Optionally, you can indicate that the membership in the projects
also should be swapped.