Uploading documents
Topics
General
When uploading documents, we differentiate between CAD-documents (drawings) and documents (correspondences, images, protocols, calculations etc). CAD-documents refer to all files containing a drawing. These can be AutoCad files (dwg) or plot files (plt) for example. A PDF file may also contain a drawing and is therefore considered a CAD-document in that case.
Documents are placed in document registers, while CAD-documents are placed into the indices of drawing registers. If a document is relevant to a drawing, it may also be filed in an index of a drawing register. However, it is not possible to file CAD-documents in document registers.
Files can be imported centrally (Automatic Import), into a folder, directly into a document register or into an index of a drawing register, respectively.
Automatic Import
If an encoding has been set for the documentation, documents and CAD-documents can be uploaded centrally and can be filed into the appropriate locations by the system. In order to identify the location of the target the file's names are being compared with the defined encoding of the folders and of the registers contained therein. Therefore, codification at the location as well as appropriate encoding of the file's names is necessary.
To open the dialog for the automatic import, choose the action "Automatic import according to the configuration".
You can upload single files as well as several files combined in a zip file. Choose the file you wish to upload by clicking on Browse.
If several files at once should be filed, these must be correctly coded and combined in a zip file. This zip file must then be uploaded. To ensure the correct code, we recommend the tool PlanZip which you can obtain from WeltWeitBau. With PlanZip, you can code files comfortably on your local system and combine them in a zip archive. Then only a single file must be uploaded.

| Note: | To use the codification tool PlanZip you need the
configuration file for the code. You can download it by clicking on the button |
When uploading a single file, the file name is evaluated according to the used code. If an unzipped, uncoded file is uploaded, the code last used is suggested by default. The file would then be filed at the same place in the documentation as the last file. You may however change the code at this point, if necessary.
Use the codification assistant for drawing
codes  or for
document codes
  .
The file is automatically uploaded as a CAD document or a document, respectively.

Before uploading the documents, check if the documents comply with the fixed code and if they can be filed into the documentation (folders with the corresponding code are available). To perform the check, click on Check.

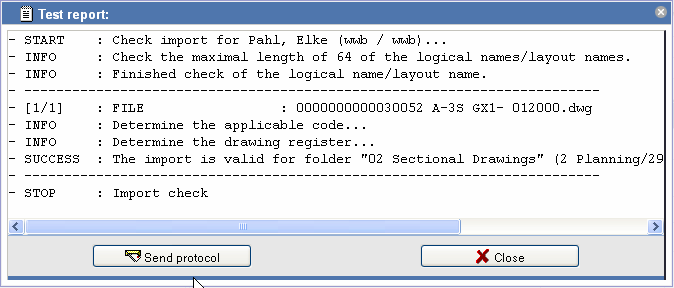
The check protocol is displayed in a dialog and can be sent to your email address by clicking on Send Protocol. This makes sense when the check was not successful, so that the problem can be analyzed more easily afterwards.
To upload the files, click on Import. The files are now filed into the documentation according to their code. Files that could not be filed correctly are mentioned in the following import protocol. You can send this protocol to your email as well for future reference.
| Note: | Please note that uploading files can take a while depending on the file size and your network connection. You can continue to work during the upload, however you can not start new actions. |
Uploading into a folder
Files can be uploaded into a folder directly. If the folder specifies an encoding for CAD-documents or
documents, complete the encoding using the codification
assistant after choosing the file.
The encoding is evaluated during the upload and the file is filed at the corresponding location. If
no corresponding location exists, the missing drawing register and the index or the document
register are created automatically.
If no encoding is given for the folder, an existing drawing register and index must be specified for
CAD-documents using the button
and an existing document register must be specified for documents using the button
, respectively. Alternatively, specify a
name for the register. Non-existing registers will be created.
Click on ![]() when
uploading documents and on
when
uploading documents and on ![]() when uploading CAD documents,
respectively, in order to set the register used during the last upload into this folder as the
upload location.
when uploading CAD documents,
respectively, in order to set the register used during the last upload into this folder as the
upload location.

Uploading CAD-documents
In order to upload CAD-documents (drawings) click on in the action bar a folder, drawing register or index.
Choose the file you would like to upload by clicking on Select Files....

If a zip file is chosen, it can be unpacked on the server. The contained files are then filed individually.
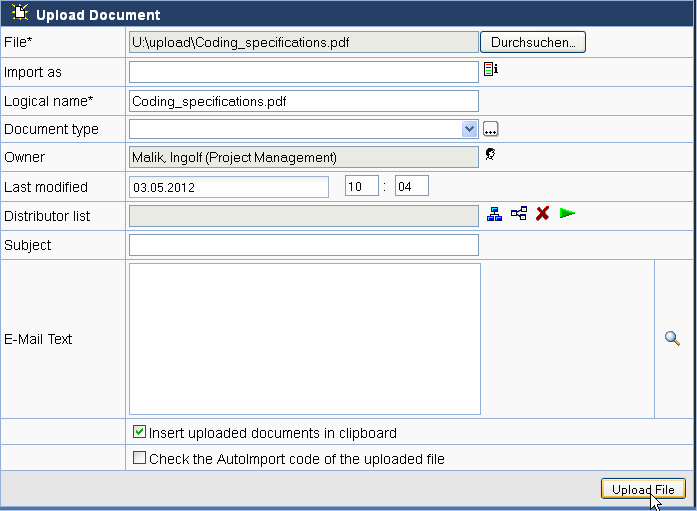
Optionally, you can change the displayed name of the document in the field "Import as" and you can change the owner.
Upon uploading, you can set the status of the predecessor. When a new index is created when uploading a CAD-document, the previous index is assigned the chosen status.
Uploading documents
To upload documents (corespondence, pictures etc.) click on the action in the action bar of the destination folder or register. Now
choose the file to be uploaded by clicking on Browse.

If a zip file is chosen, it can optionally be unpacked on the server. The contained files are then filed individually.

Optionally, you can change the displayed name of the document in the field "Import as" and you can change the owner. The logical name corresponds to the file name used internally and is supplemented with a numbering if a file with the same name exists.
If the document is uploaded into a folder and a missing document register is created automatically, the document type is used as the register type. If a document is uploaded directly into a document register, the document type is inherited from the document register or is determined according to the code. This requires the value to be defined in the master data of document registers as well as documents.
It is also possible to create links to paper documents using the button as well as to create links to websites using the button
.
Distribution
If you wish to inform other people about the upload of the documents click on the action "import and distribute".
After the upload an e-mail creation dialog will be automatically opened containing the uploaded (CAD-)documents.
Drawing and document code
In order to profit from the advantages of the automatic import as well as the uniform and unique identification of drawings and documents, codes are used in the documentation. Drawings and documents use their own code, respectively.
There exist three types of code: a general code rule (how drawings and documents should be encoded and which values are available for the code), specifications in folders and registers on the grounds of the code rule and specific codes for drawings and documents.
If a code is specified in the documentation, the code is offered when importing drawings and documents. In order to avoid mistakes and to create valid codes, please use the codification assistant.
Codification assistant
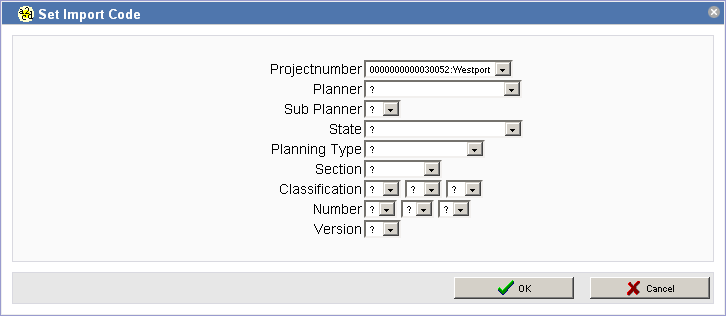
In order to avoid mistakes and to create valid codes, use the codification assistant .

In the codification assistant you can comfortably choose valid values for the individual parts of the code.

Values in the code can possibly depend on other values or on code specifications in folders. Non-valid values are marked in a different color.
Click on OK to apply the settings. The code is now copied to the field document/drawing name. Values not set with the codification assistant (marked with a '?') are now displayed with hash marks ('#'). If the code is applied as the document name, these values are displayed using minus signs ('-').