Releases
Creating Releases
The issuing of releases is done in two steps: First, a release must be created for the corresponding objects. Then, the release is issued by an authorized user.
Releases are created with the icon ![]() in
the action bar for folders and maps, on the properties pages for indices and documents, on the
right next to the field "Last Release" or in tables with documents.
in
the action bar for folders and maps, on the properties pages for indices and documents, on the
right next to the field "Last Release" or in tables with documents.
In the input mask for the creation of the release, choose one of the available releases for the project in the field "Release" . In the field "State" you can define if the release is created as "Open", "Released" or "Not Released". If you choose the state "Open", the release can be given or not given later on by an authorized user. Otherwise, the release is created without the possibility of change.

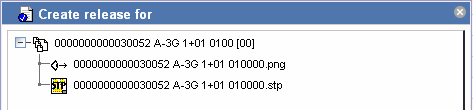
If you click on the green arrow next to the field
Release for, you get an overview of the elements for which the release will be created. Close
the overview with OK.
The option "Send e-mail subsequently" opens the editor for creating a message after the creation of the release is completed.
Releases are shown under the information section for a document or an index.

Issuing Releases
You can issue or not issue a release. Click on the icon for the corresponding release.
Adjust the suggested date if required and in the drop-down list "State" choose if you want to issue the release as "Released" or "Not Released".
With the options "Release on schedule?" and "Send E-mail?", you can add further information when issuing the release.
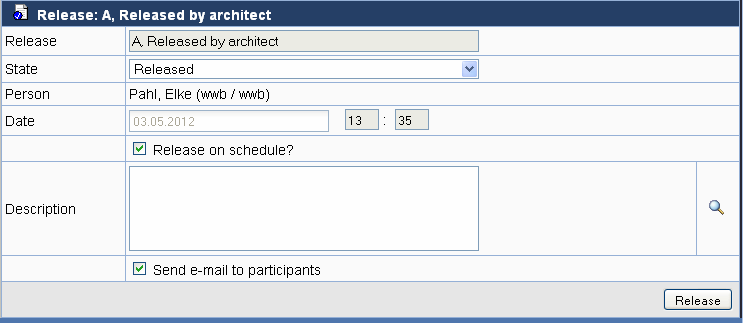
The issued releases will be shown under the information section for a document or an index. Issued releases can not be changed.

The release can be designed so that it regulates the access rights for a document. By default, a release has no effect on access rights. It is also possible, for instance, that certain releases can be created only for CAD documents, but not for documents.